Making a Solar Panel Mount for a Bike
I had chosen to use a 15W, monocrystaline panel mounted under glass in a metal frame. It was made by ET Solar and bought on ebay for 33 GBP. This seems like a good panel, but it weighs 2kg and measures 450 x 299 x 35 mm. I had to find a way to attach it to my bike.
I considered putting it at the front, but the back seemed to be the easiest and best place. In placing it I wanted to avoid shading from me or any radio antennas as much as possible, and it was very important to try and design to my principle of minimising faff.
I decided I needed to mount it above the rear rack somehow. Getting it higher also has the advantage of getting more sun if I am in the way at the time.
Ideas
Bungees
The simplest way to mount it was to bungee it on top of the other gear on the rear rack - my tent and roll mat. This was very easy to do, kept the weight low - so reducing forces from putting at at the end of a lever higher up, and it was well cushioned from shock by the gear. However, the problem with this setup is that it makes it harder to get at my tent and to fix and remove and other gear. One think I remember really hating when touring before is the time spent mucking around trying packing and unpacking things. I wanted to get the panel out the way.
Custom Metal frame
A rack could be built in metal, as an addition to the existing luggage racks, or a custom rack for panniers and solar panel could be built.
Seat Post Rack
I looked at rear racks that attach to the seat post - this would give an additional rack to the conventional one I had fitted. This would add even more weight though, and they did not go very high, so there would not be much space between the racks. I also wanted to save money on buying things, but given the time spent it turned out this was not a valid reason.
Fibreglass / Composite Luggage storage
The idea is to build a custom structure that would serve as luggage storage and solar mount. This would remove the need for panniers. It could also incorporate spaces for electronics and batteries - for example giving an easily accessible slot for changing batteries.
One way I’ve seen to do this that looks very good is a cardboard core glass reinforced plastic structure. This can be easily built and hacked to any shape. This was the technique used by Steve Roberts for a similar project.
Another fibreglass method was used for a solar bike project:
I think the idea for this was:
- Build with cardboard.
- Fill with expanding foam.
- Remove cardboard.
- Fibreglass over.
So it doesn’t end up as a composite with the cardboard core as with the other method.
Build / Test
I decided to make a metal frame myself. This would put the panel where I wanted it, and it should be possible to make it much lighter than a seat post rack. Fibreglass looked like it could give a very nice structure, but it would also be messy to work with and I didn’t have anywhere I could do that work. It would also be expensive and I suspect very time consuming.
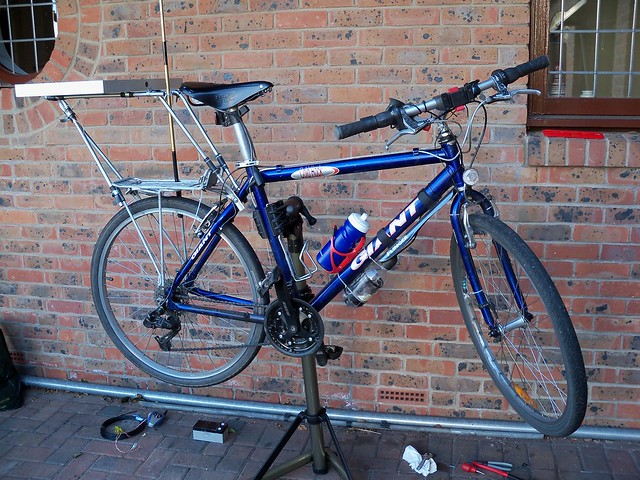
The final design. More detailed photos are on flickr.
I had never made anything like this before and didn’t know anything about working metal. I didn’t even know where to buy it. One day though I found what I think might have been a bike rack for a car dumped beside a bin. I recovered the smaller tubes and started working out what I could do with them.
The design I ended up with was mostly determined by the material I had available. I used aluminium tube, which seemed like a good choice because it was light and probably strong enough.
The most difficult part was bending the tubes. Bending a tube by hand can cause it to collapse. I researched online and read that filling tubes with sand first would work. I did this, but one of the bends still flattened out to the point I was concerned it might break. It survived a little testing round Edinburgh though so I kept it.
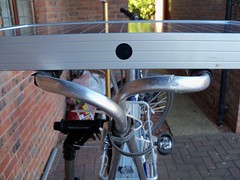
The tubes I attached to the bike at the front by screwing onto the rack mounting points, and at the back with Jubilee clips (hose clamps) padded with inner tube. The panel is attached to the rack with p-clips, which are horrible to work with because they are so difficult to bend into the right shape. It worked though.
It worked until an awful road in Mexico. Update to follow…